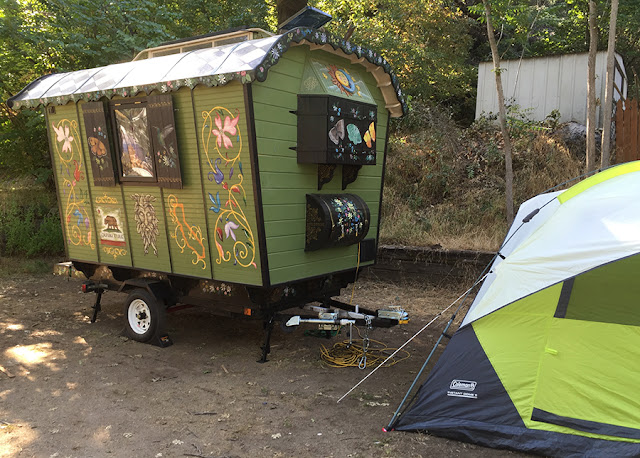
Nearly two years ago I started on a project that I didn't dream I would even complete, but I had to give it a try anyway. Today August 9, 2020 that project is complete. I am going to cover the steps throughout this blog.
I will start out with a photo of a gypsy wagons that inspired me to try this project in the first place. I had no plans other than the photos shown below.
I considered this project a challenge since I had no plans to go by, and I thought of it a labor of love.
I started with the bare trailer shown below.
I took the 2x8 boards off and wire brushed and painted the trailer frame and checked the wheels.
I then painted 3 sheets of 3/4 inch plywood with deck paint a put it painted side down on the frame to help protect against moisture from the bottom. I framed in the floor with 2x4s and put foam insulation between the 2x4s and a vapor barrier on top of that and built the frame for the section that juts out at the bottom.
Painted 3/4 inch treated plywood for bottom of the wagon.Framed base with foam insulation and the side that jut out.
Next I framed the ends and cut 1/2 inch plywood to put in place at both ends.
I secured the two ends as shown below.
While I was doing the framing I was also building the little skylight for the roof.
The side framing and the windows went in next.
I notched the ends to secure the roof beams as shown below.The bay window was built in place. And electric and plumbing was installed.
Hot water heater was installed.
An RV toilet was installed.
When the plumbing was completed I pulled the trailer out of the building to check for leaks. All was good thanks to pex tubing. It is so easy to work with and novice friendly.
Back into the building and I started putting in the ceiling paneling and interior wall paneling.
The bathroom and indoor shower were completed.
Foam insulation was place in the walls and the exterior siding went on.
Fiberglass bat insulation was used in the roof and two layers of 1/4 inch plywood.
Linoleum was installed prior to interior framing.
Storage under the seats and the kitchen counter.
Bathroom shelves.
Kitchen shelves.
The dutch door opens on the top as well as the full door itself.
Note the outdoor shower.


Comments
Post a Comment